subscribe newsletter

Newsletter Subscribe

Enter your email address below and subscribe to our newsletter

How to debloat Windows 11 From Junk Apps (Best Method)

The method of removing apps and services that you find unnecessary, invasive, or otherwise wasting system resources from Windows 11 (in this case) is simply referred to as debloat. Windows 11 is a modern operating system that comes with its part of pre-installed software that might not align with your preferences and needs.

However, even after a clean installation, Windows 11 comes with a cluster of software or services that run continuously in the background leading to a waste of system resources, battery life, and collecting usage data with no option of turning them off. As a Windows 11 user, you might have encountered many preloaded applications that are used rarely, which consume space and slow down the system.

There are ways to figure out how to debloat Windows 11 to improve its performance significantly and through this blog, we will have a detailed discussion on the best three methods to debloat Windows 11 from junk apps.

If you are a Windows 10 user, it is recommended you use debloat Windows 10 tool by Sycnex from GitHub. It doesn’t require any download, just an easy PowerShell command is all you need.

1. Using JunkCtrl or Bloatynosy – The real Windows 11 Copilot

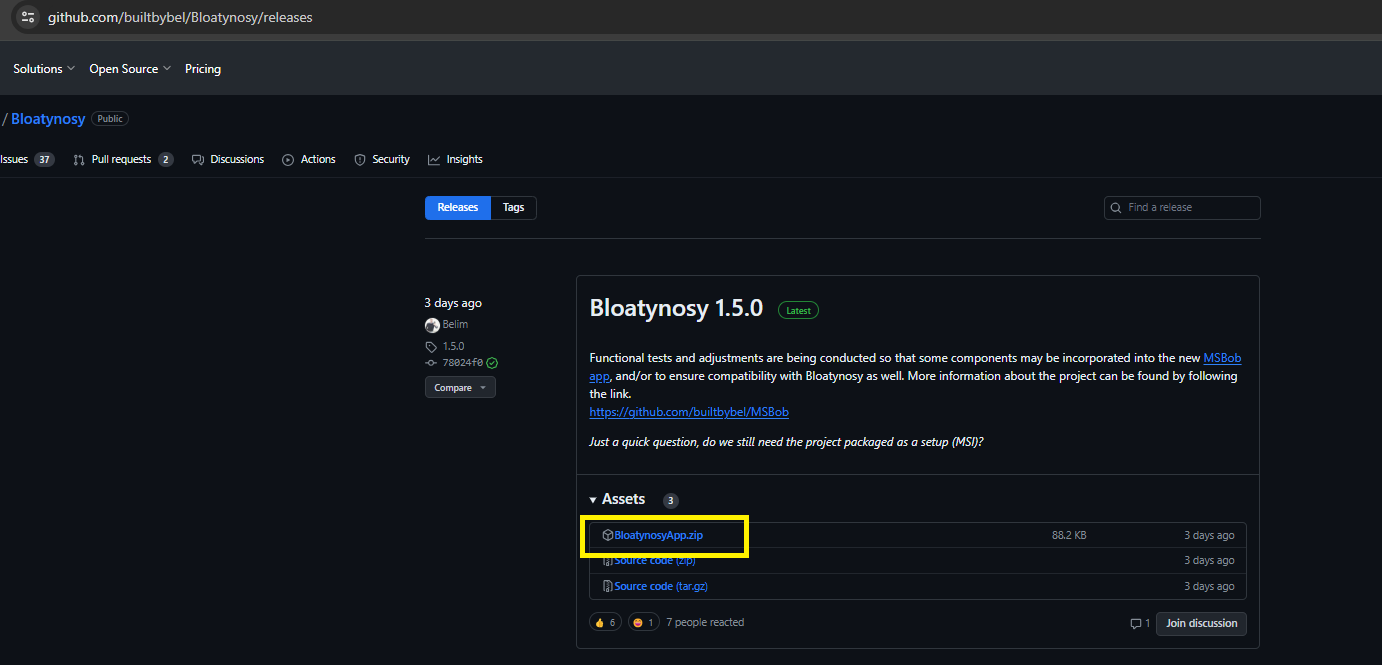
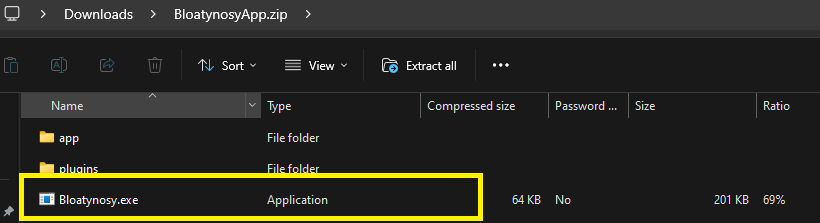
Here we use the tool “Bloatynosy” which helps to debloat Windows 11 easily and quickly. You can find this tool through GitHub. It’s Open Source and free to download. This simple software is highly beneficial for uninstalling many unnecessary apps, including the ones that are not available through the “installed app” settings page. Earlier it was called JunkCtrl but now it got renamed to Bloatynosy.

Steps to remove bloatware from Windows 11:

  1. Go to the link “https://github.com/builtbybel/Bloatynosy/releases
    Debloat windows 11 -
Bloatynosy
  2. Click on the latest release of the “BloatynosyApp.zip” file to get the debloat tool and download it.
  3. Go to the downloaded file and extract all files.
    Downloaded
  4. Double-click Bloatynosy.exe files to launch the app
  5. Click the Yes button on the installation prompt
  6. It is recommended that you don’t check plugins, but if you want to remove every bloatware to make it extra light, then go for it (it may affect Windows features). Click the “New search” button. It will search for all apps that you can’t uninstall through Windows-installed apps.
    debloat Windows 11 - JunkCtrl App
  7. Check the apps you want to remove and press the “Add everything selected to bin” button
    debloat Windows 11 - select apps (junkctrl.exe)
  8. Now “All my apps” page comes here you can select multiple apps by clicking the Ctrl button and moving to the Recycle bin portion. 
    Debloat windows 11 - JunkCtrl - All my apps page
  9. Click the “Move All” button to debloat all the apps from Windows 11 (if you prefer – not recommended).
    Click the “Show system apps” option to show system apps, including apps you often can’t uninstall from Windows 11, such as Widgets, Your Phone, etc. (If you prefer – not recommended).
  10.  After selecting the apps to remove, click on the “Uninstall” button.

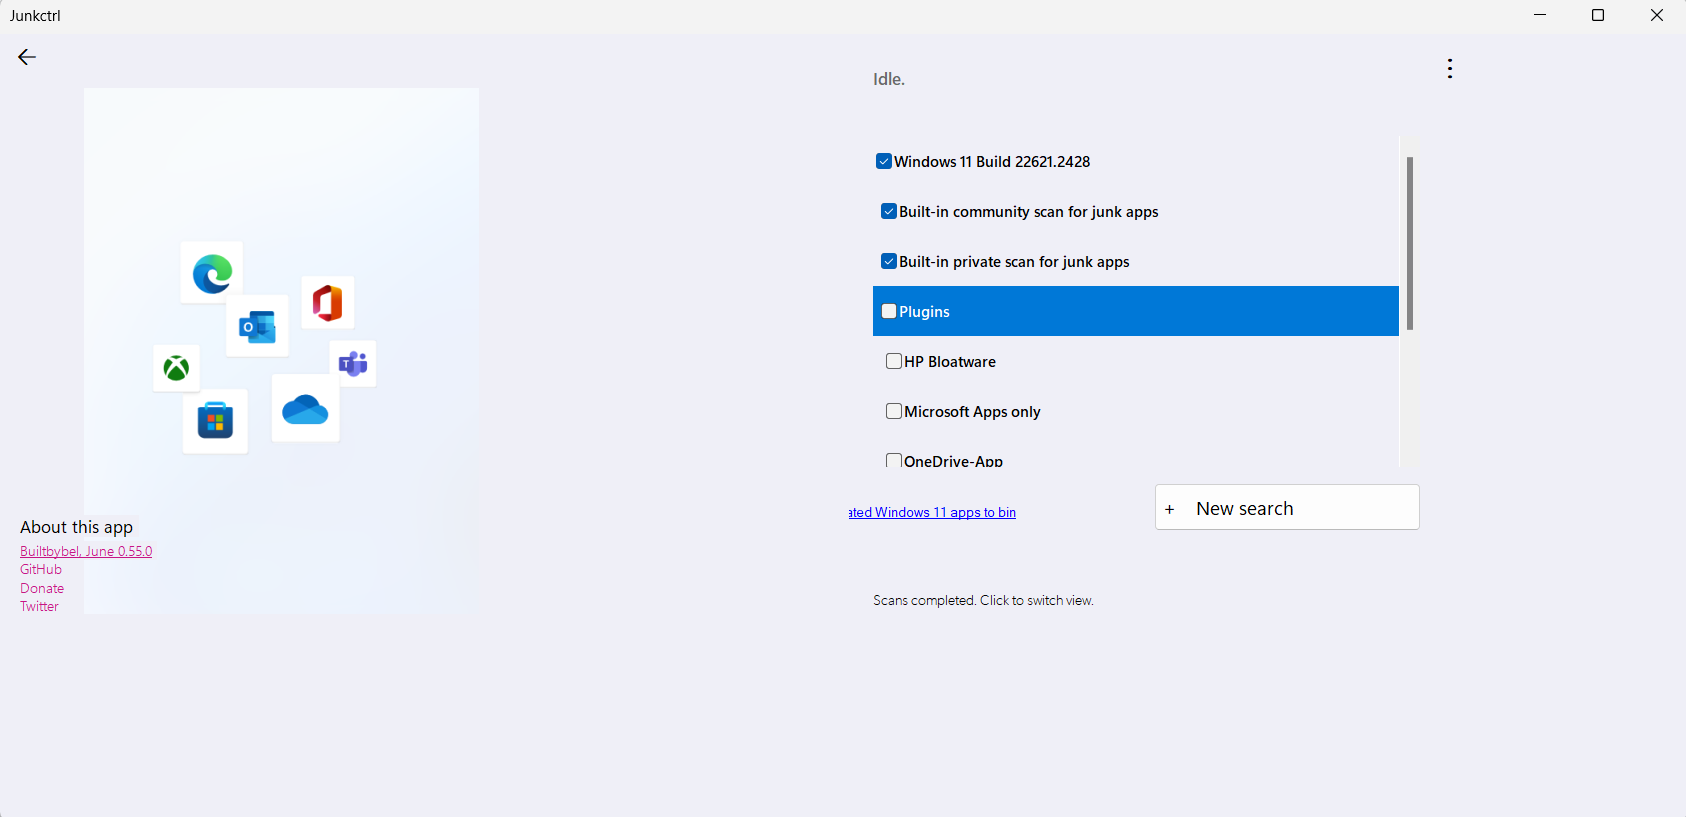
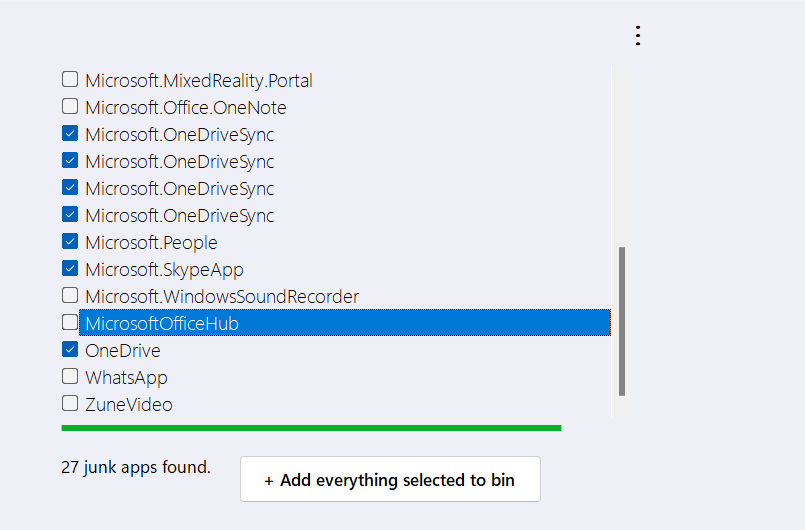
Upon the completion of the steps, the tool will run the requisite scripts to remove the selected apps and services to debloat your system. Remove those apps that you don’t use and take up system space. However, here you won’t be able to remove the most important built-in apps such as Microsoft Edge, .net framework, etc. as they are required for the Windows 11 experience or for other programs. 

Features: 

  • Open Source – MIT license  
  • Less Open issues in GitHub. See https://github.com/builtbybel/Bloatynosy/issues
  • Trusted – the app developed by this GitHub account is well-trusted across the community
  •  Well maintained – Last updated a few months ago

2. Debloat Windows 11 in Two-Click – Best method if you are installing fresh Windows 11 

The two-click method is a simple way to remove bloatware. The ploy is when you proceed to do a clean installation of Windows, a screen pops up for the installer. Simply change the region and currency option to “English (World)”

install windows 11 - debloat Windows 11
Step 1: (First Click) Change the region before installing

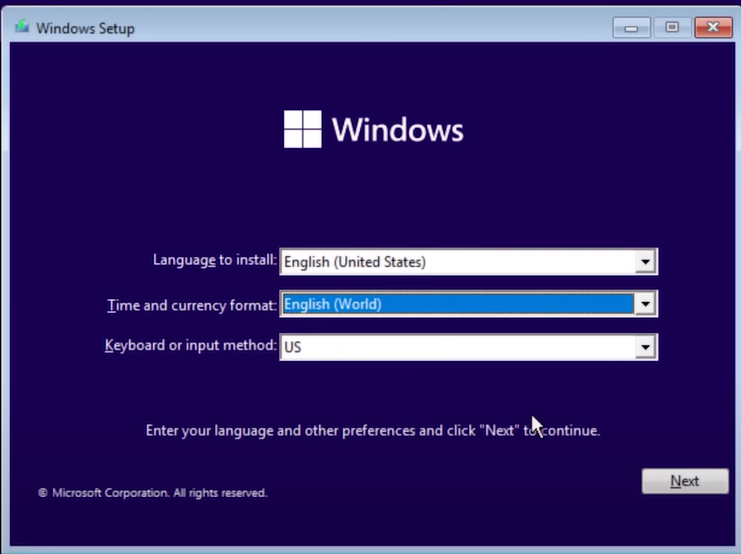
Follow the installation process in the exact same way and when you restart to start the out-of-the-box experience, you will notice an error that says “OOBEREGION” 

Skip it and eventually, you will get into Windows where the start menu pops up and there you will have a nice clean start menu.

Step 2: (Second Click) Change the Region after installation.

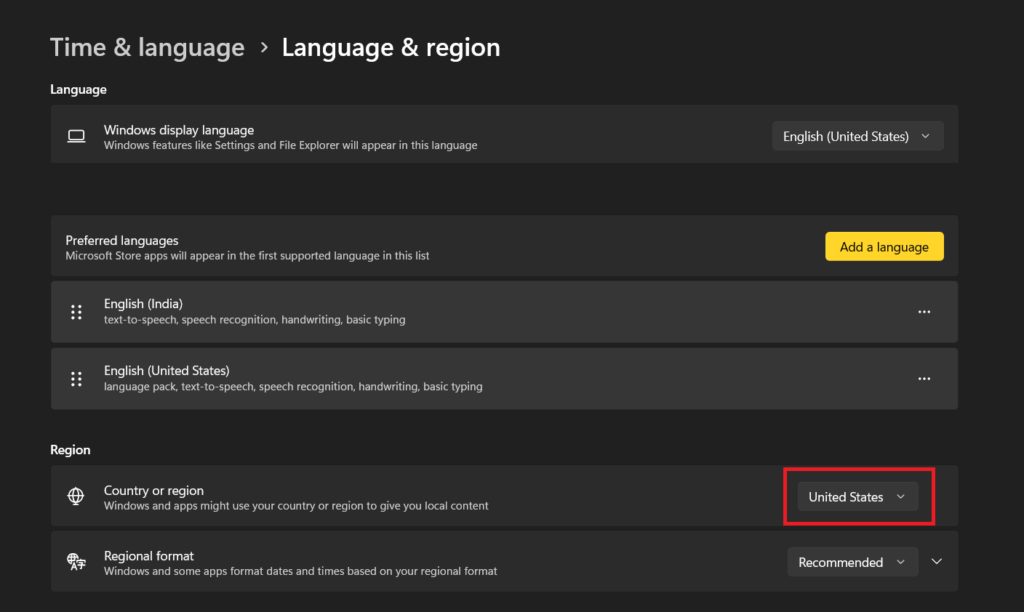
Make sure to change the region of where you actually are for your Microsoft store to work properly after the desktop is up. In this method, the default Microsoft apps are still installed, and only the third-party apps won’t show up in the start menu.

 Features: 

  • No 3rd party software involved 
  • A simple step to avoid selecting a region that prevents bloatware installation as Windows bloatware is region-specific

Also Read: How To Fix Windows 11 Common Issues

3. Tiny 11 Builder – For old PC’s with limited resources 

Through Tiny 11 builder, you can make a lightweight Windows 11 install by removing unnecessary apps and services so that the system can run well with just 2 GB of RAM.

Follow the below steps to make a lightweight Windows 11 image with Tiny 11:

  1.  Go to the link “https://github.com/ntdevlabs/tiny11builder”
  2. Download and unzip it to its own folder 
  3. From Microsoft, download the official Windows 11 ISO
  4.  Mount the ISO by right-clicking on it and selecting the mount
  5. From the file explorer, navigate to “This PC” where you will see the ISO image mounting. (open the drive to check if it is working properly or not) 
  6. Open the folder, right-click on the “tiny11 creator.bat” file, and then choose the “Run as administrator” option 
  7. A command prompt dialogue box will open up, and now you have to type the “Drive Letter” that you noted where the ISO file was mounted and then click Enter
  8. Now it will begin to copy the files from the drive and once completed, it will display all the different versions from it with the index numbers. 
  9. After that, type the “Index Number” of the version you want to debloat and then click Enter.
  10. Now, the script will start debloating the ISO Image files by removing all the unnecessary apps, bloatware, etc 
  11. Close the command prompt by pressing any key from your keyboard. 

Features: 

  • No hardware limitation 
  • The file can be built using bat script from the latest Windows ISO: giving an edge on using the latest Windows build.

Also Read: Add Me To Search, Add Yourself to Google Search & Google’s People Card

Wrapping-up: 

In this blog, we have discussed the best three methods to debloat Windows 11 from junk apps. Removing unnecessary apps and software will help you enjoy a faster, leaner, and more efficient Windows 11 experience that is customized to your preferences and needs.

Tecxy
Tecxy

As the friendly face behind Tecxology, Tecxy is your go-to companion for the latest tech buzz. From gadget reviews to Windows troubleshooting tips, Tecxy’s circuits are wired for knowledge. Whether you’re a seasoned techie or a curious newbie, follow Tecxy’s bytes to navigate the digital universe. 🤖🌐

Leave a Reply

Your email address will not be published. Required fields are marked *


Stay informed and stay ahead!