
Newsletter Subscribe
Enter your email address below and subscribe to our newsletter

The latest technology updates & more!
Taking a screenshot on a Windows PC is a quick and easy way to capture what’s on your screen. Whether you’re using Windows 10, 11, 7, 8, or 8.1, on a desktop or laptop, there are several methods to take screenshots.
Remember that taking screenshots is a helpful skill that can help you capture vital information or share what’s on your screen with others. With these methods at your disposal, you can take screenshots quickly and easily whenever you need them.
Table of Contents
The simplest way to take a screenshot on a Windows PC is to use the Print Screen key. This key is located in the top row of your keyboard and may be labeled as “Print Scr”, “PrtScn” or “PrntScrn”.
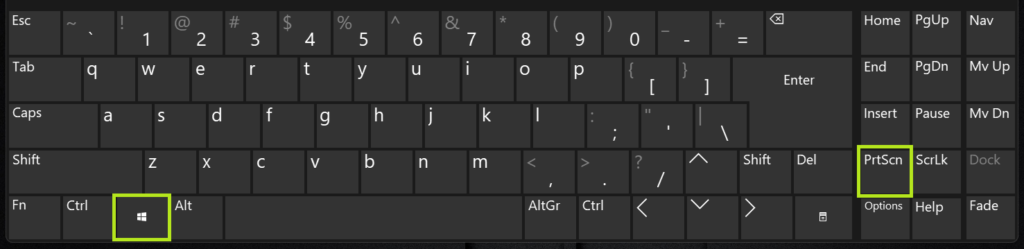
Print Screen key on your keyboard. It will capture an image of your entire screen & copy to your clipboard.Alt + Print Screen. This will capture an image of all screens and copy it to your clipboard.This will save the screenshot into Pictures> Screenshot folder on windows pc.
The Snipping Tool is a built-in utility on Windows that allows you to take screenshots of specific areas of your screen.
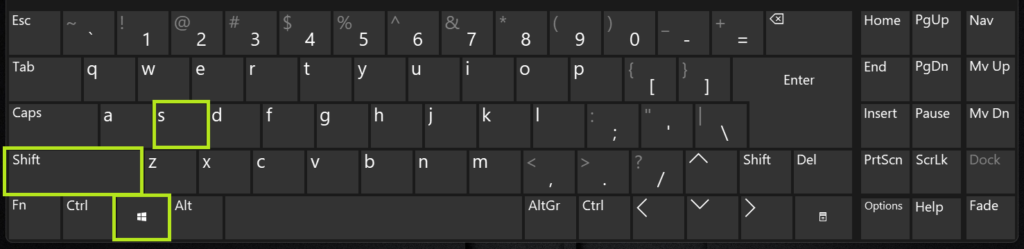
It won’t save the screenshot snip on your computer until you click on the pop-up and save it. If you save, it will be in the Pictures> Screenshot folder on Windows pc.
This method is best because it prevents unnecessary steps and saves unless you want to.
The Snip & Sketch tool is another built-in utility in Windows that allows you to take screenshots. It’s available on Windows 10 and 11.
Start button and type “Snip & Sketch” in the search bar. Click on Snip & Sketch app to open.New button to start a new snip.If you’re running Windows 10 or 11, you can use Game Bar to take screenshots while playing games or using other full-screen apps.

Windows + G on your keyboard.Camera icon to take a screenshot.Videos\Captures folder on your Windows pc.These are some of the most popular methods for taking screenshots on a Windows PC. Whether you’re using Windows 10, 11, 7, 8, or 8.1, on a desktop or laptop, these methods should work for you. If you are looking for a screen recorder then OBS studio is the best alternative for you.
In conclusion, taking screenshots on a Windows PC is easy and can be done using several methods. Whether you’re using the Print Screen key, the Snipping Tool, the Snip & Sketch tool, or the Game Bar, you can quickly capture what’s on your screen. These methods work on Windows 10, 11, 7, 8, or 8.1, on a desktop or laptop. So next time you need to take a screenshot, just choose the method that works best for you and start capturing!